
Letter O Polymer Clay Alphabet Cane Tutorial
Here is the latest letter in the free series of step-by-step tutorial articles on making polymer clay letter canes. (Click here for a list of all of the other alphabet canes so far.) This one is so easy you probably don’t even need a tutorial for it, but just for the sake of completeness, here it is: Letter O polymer clay alphabet cane:

Step-by-step instructions: Letter “O” polymer clay alphabet cane
You will need:
- Approx. 30g white polymer clay (i.e. half a standard-sized block of clay)
- About. 8g of black polymer clay (approx. an eighth of a standard block)
- A pasta machine or clay roller (example from Amazon)
- Tissue blade – a.k.a. polymer clay slicer blade (example from Amazon)
Step 0: First, make sure that the clays are ‘conditioned’ (roll each colour separately through the pasta machine on the thickest setting about ten times so that they become very flexible)
Step 1: Slice off around a third of the white clay and put it to one side for now in order to work with the larger white piece first.
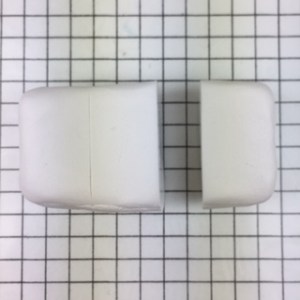
Step 2: Using the larger block of white clay, roll it into a cylinder around 2.5 cm (1 inch) wide, and 2.5 cm diameter tall:

Step 3: Using the pasta machine, roll the black clay into a sheet approximately 2mm thick (e.g. using the middle setting of the pasta machine):

Step 4: Wrap a single layer of the sheet of black clay around the sides of the white cylinder, and then trim off any excess black:

Step 5: With the smaller white piece of clay that was set aside in Step 1, roll it through the pasta machine on the thinnest setting. Then wrap layers of the thin white sheet around the outside of the cane:

Finished Letter O:
I hope you found this tutorial useful. Have you tried it out yet? If so, please send me a photo via social media (e.g. tweet @polymerKay). And if you’d like to receive the tutorials and other content as emails as they are created, please sign up for the newsletter and/or use the contact us form.